This article contains affiliate links. If you book through them, I earn a small commission at no extra cost to you.
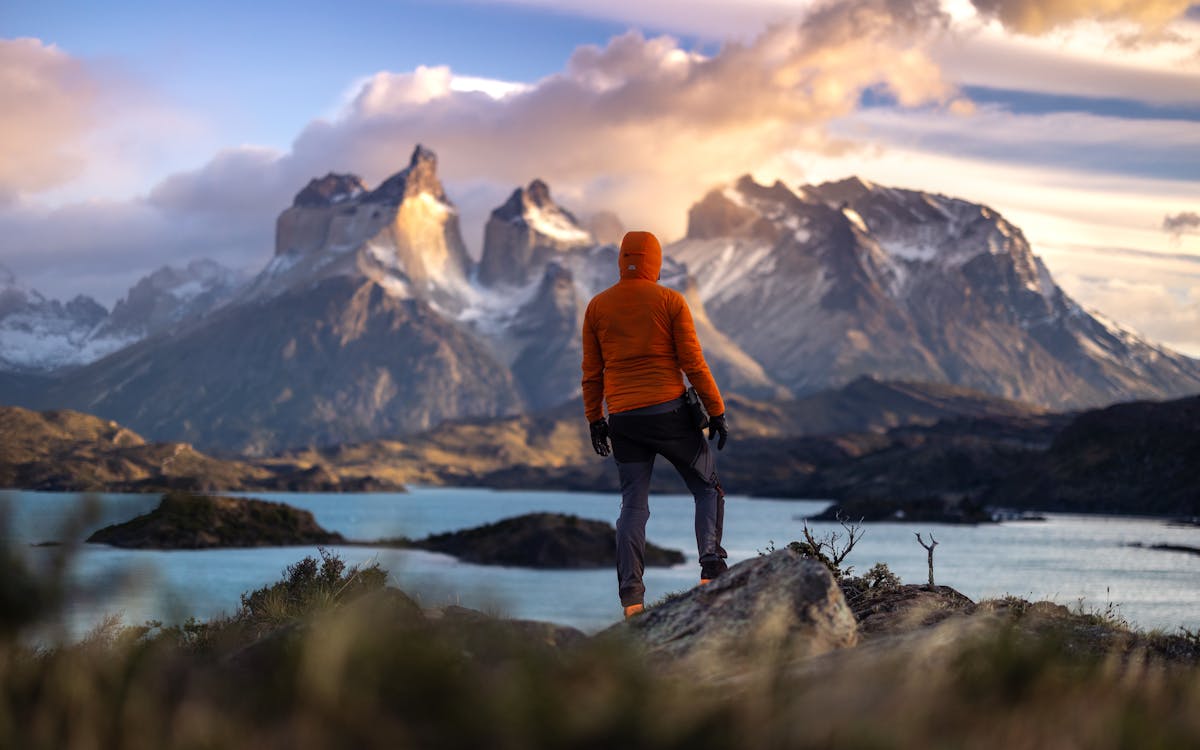
The wind hit so hard on the ridge above the French Valley that I had to plant both trekking poles and lean into it like a door that wouldn't close. My rain shell was making a sound I can only describe as violent applause. Somewhere below, Grey Glacier was calving icebergs into a lake the color of powdered milk, and somewhere behind me, a German hiker was laughing — the kind of laugh that happens when your body doesn't know what else to do.
That was day three of the W Trek. I had been rained on, sunburned, and windblasted in a single afternoon. My feet were a disaster. And I was having the best week of my life.

Why the W Trek Kept Me Up at Night (Before I Even Got There)
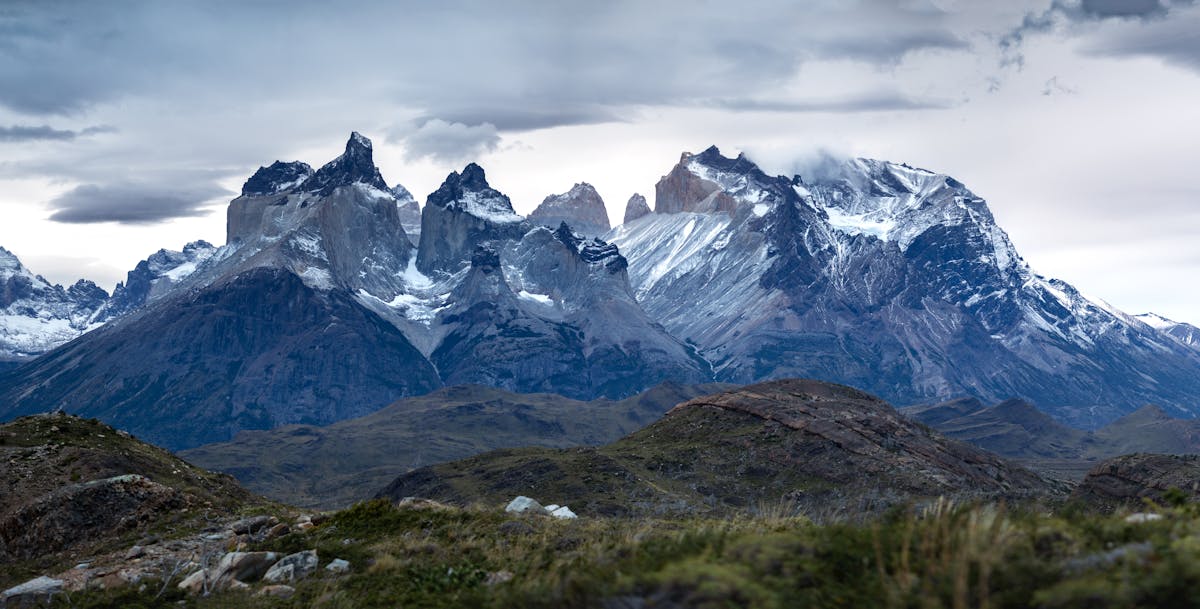
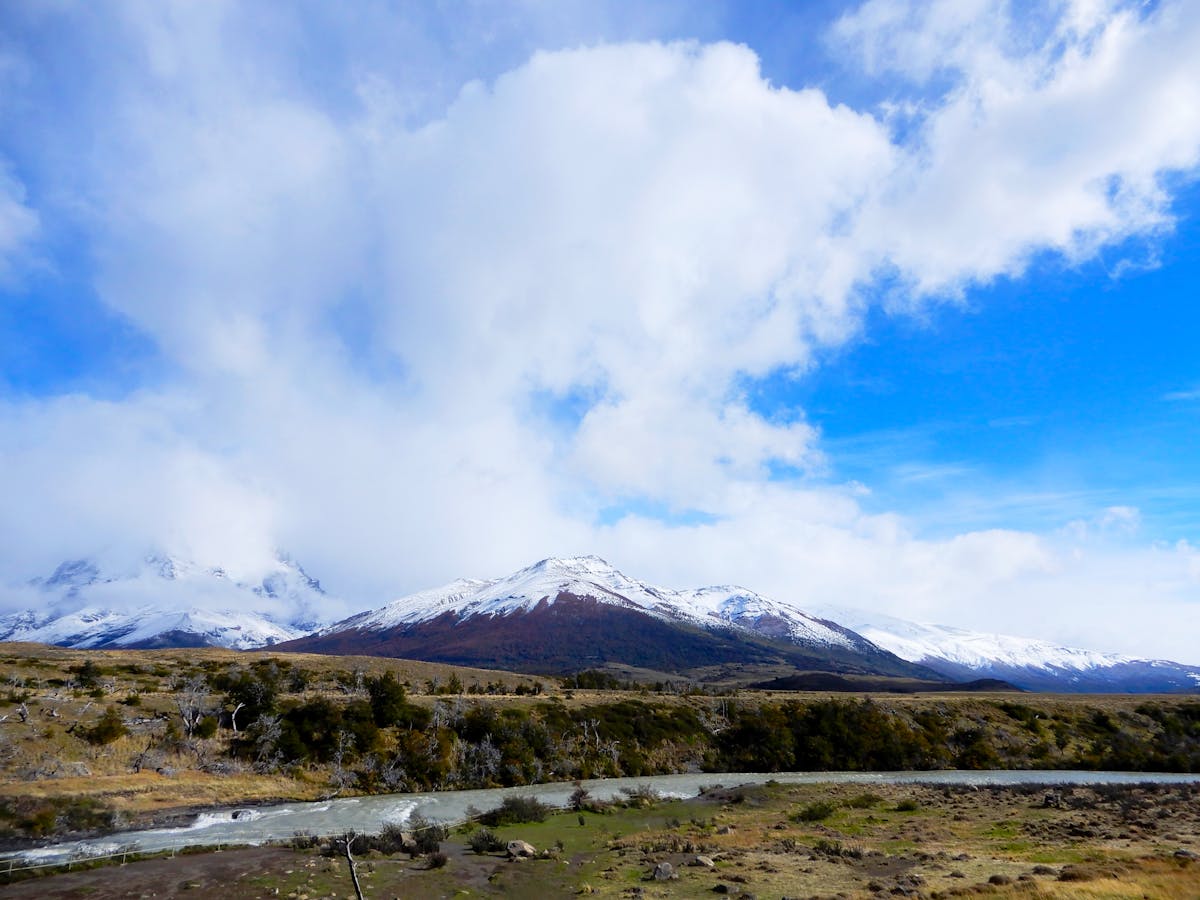
I had been wanting to do this trek for years. The W is the most popular multi-day hike in Torres del Paine National Park, a five-day route shaped roughly like the letter W that passes through the park's three crown jewels: the Grey Glacier, the French Valley, and the Torres themselves — those granite towers that show up on every Patagonia calendar ever printed.
But the planning nearly broke me. Torres del Paine is not a place you can wing anymore. Every campsite and refugio on the trail must be booked months in advance, the booking systems are split between two different companies, and the whole operation has gotten significantly more expensive over the past few years. I spent more time on spreadsheets for this hike than I did for some international flights.
Was it worth it? Absolutely. But you need to go in with your eyes open about the logistics, the weather, and what this trek actually demands from your body. This is everything I learned — the useful stuff, the things I got wrong, and the parts nobody warned me about.
The Booking Nightmare (Start Here, Start Early)
Here is the single most important thing about the W Trek: book your refugios or campsites the moment reservations open. I am not exaggerating. Popular dates in January sell out within hours.
The trail is managed by two separate companies — Vertice Patagonia runs the western section (Grey and Dickson) and CONAF/Las Torres runs the eastern section (Chileno, Central, and the base of the towers). The refugios in the middle (Frances, Los Cuernos, Paine Grande) are split between them. You need to book each night separately through the correct company's website.
Reservations typically open in early October for the following season (October to April). I booked in late October and already found my first-choice dates gone at two campsites. I ended up shifting my entire trip by three days to make the bookings line up.
Quick Tip
Have your dates flexible and book the hardest-to-get sites first (Camping Frances and Camping Chileno fill fastest). Build the rest of your itinerary around what's available there.
Refugio vs. Camping — How I Decided
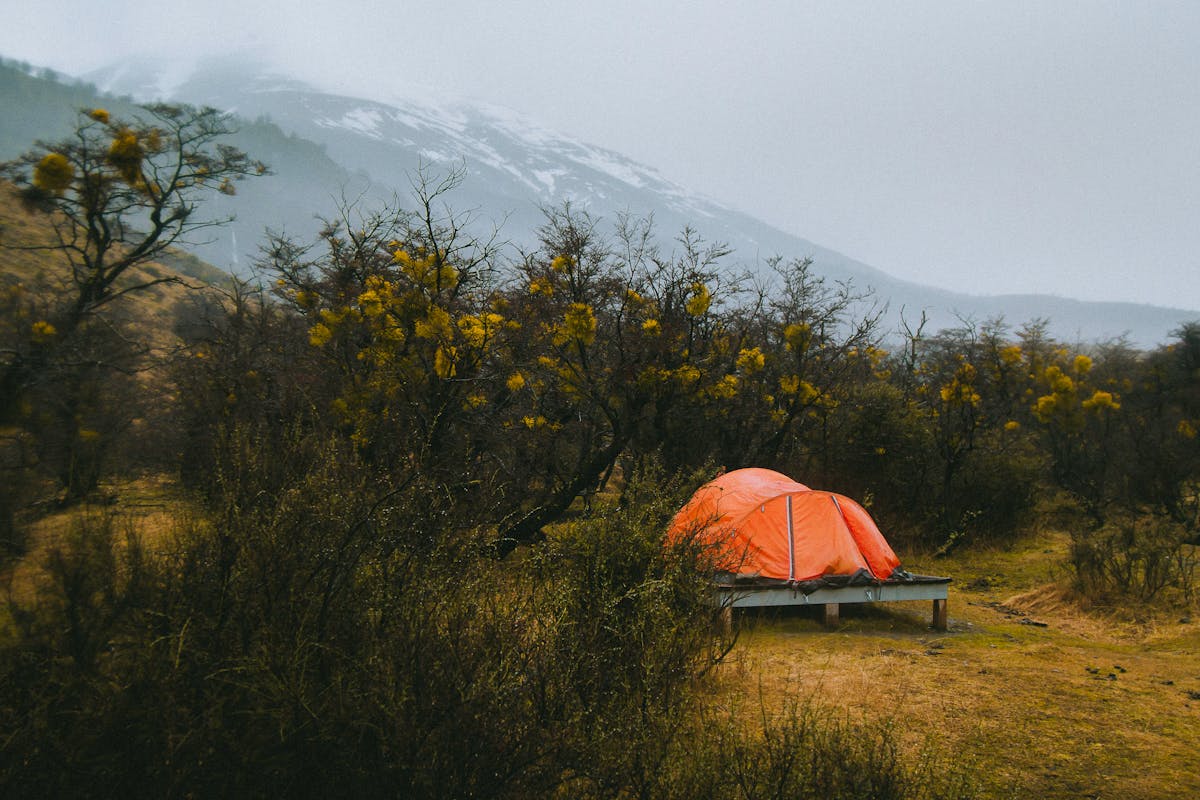
You have two options at each stop: a refugio (bunk bed in a shared dorm, meals included) or camping (bring your own tent, or rent one). The price difference is massive.
I camped the whole way. A campsite costs roughly $8,000-12,000 CLP per night (around $8-12 USD). A refugio bunk with full board runs $120-180 USD per night. The math was simple for me — five nights in refugios would have nearly doubled my total trip cost.
| Option | Cost per Night | What's Included |
|---|---|---|
| Campsite (own tent) | $8-12 USD | Tent pitch, access to toilets/kitchen shelter |
| Campsite (rent tent) | $30-50 USD | Tent, mat, pitch, toilets/kitchen |
| Refugio dorm | $120-180 USD | Bunk, sleeping bag, dinner, breakfast, hot shower |
The trade-off: my pack weighed about 14 kg with tent, sleeping bag, stove, and food. The refugio hikers were cruising with daypacks. By day three, I was jealous of their light loads but not jealous of their dorm snoring stories. You pick your suffering.
What to Pack (and What I Packed Wrong)
I overthought packing and still got it wrong. Here is what actually mattered on the trail.
Layers are everything. I experienced temperatures from 2°C to 22°C on the same day. A merino base layer, fleece mid-layer, and a proper waterproof shell — that combination handled every condition the Patagonian weather threw at me. I brought a puffy jacket for camp and was grateful for it every single evening.
Your rain gear is your wind gear. The rain in Torres del Paine is horizontal. It comes sideways, from below, from directions you didn't know rain could come from. A poncho is useless. You need a jacket and pants with sealed seams and a hood that cinches tight. The wind alone — even on dry days — will cut through anything that isn't windproof.
Trekking poles saved my knees. I almost left them behind to save weight. That would have been a serious mistake. The descents on days two and four are steep and loose, and by day three my knees were talking to me. The poles turned what would have been painful slogs into manageable ones.
What I packed wrong: Too much food. I brought five days of freeze-dried meals plus snacks, and it was way more than I needed. The refugios sell basic meals and snacks (expensive, but they exist), and some campsites have small shops. I could have cut two days of food and saved significant pack weight. I also brought a hardcover book, which in retrospect was insane.
Getting to the Trailhead
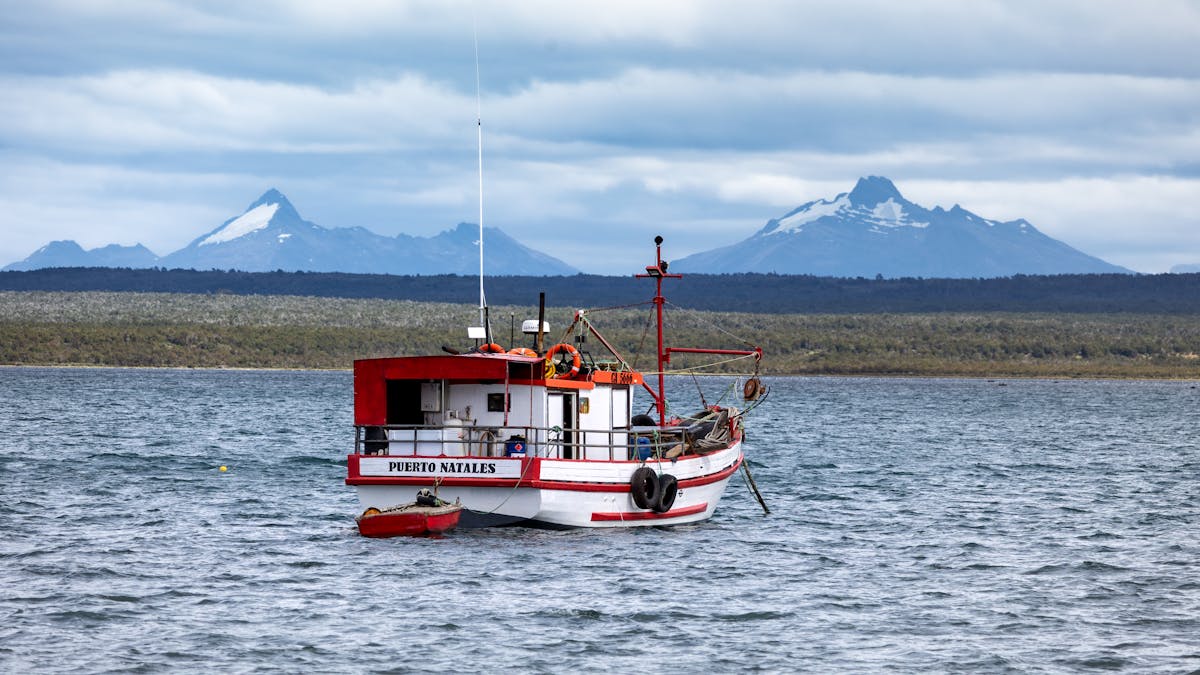
Most people fly into Punta Arenas from Santiago — it is a three-and-a-half-hour flight, and there is no way to sugarcoat how far south you are going. From Punta Arenas, it is a three-hour bus ride north to Puerto Natales, the gateway town to the park.
Puerto Natales is where you do your final prep. Stock up on gas canisters (you cannot fly with them), grab any missing gear from the outdoor shops on the main street, and eat a proper meal — the last affordable one you will have for a while. I spent a full day here and was glad for it. Some people try to arrive and head straight to the park. That is a mistake. You want a buffer day for delayed flights, missing gear, and general mental preparation.
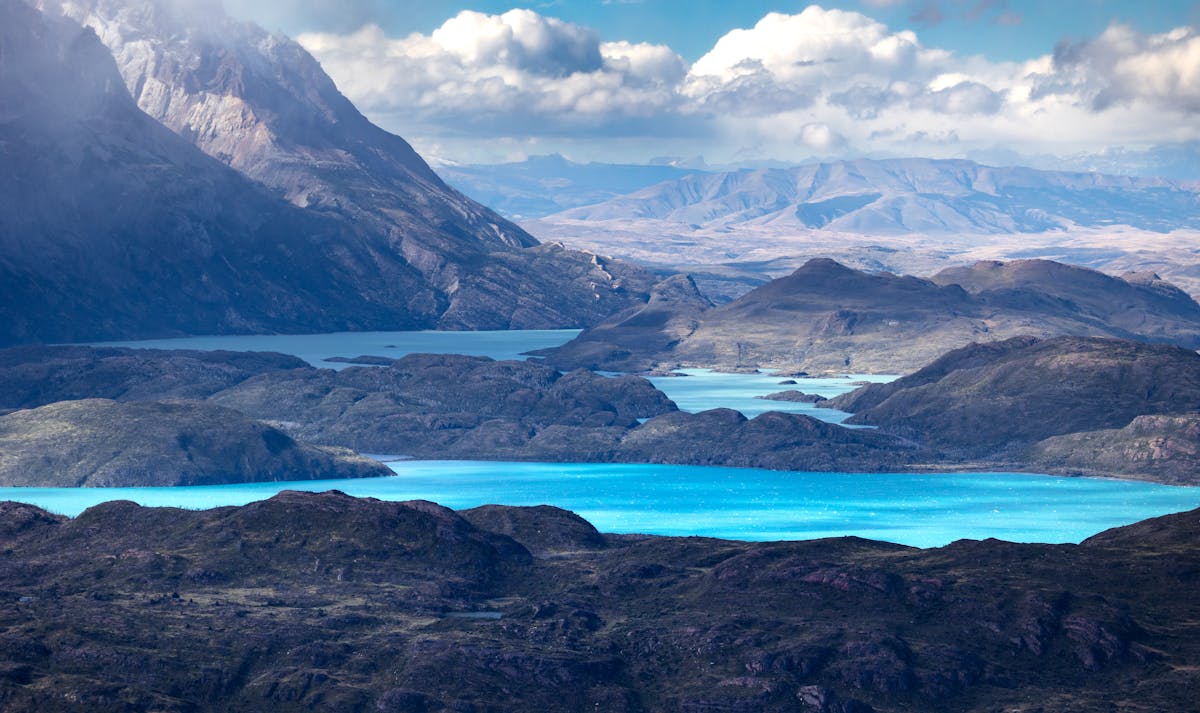
From Puerto Natales, morning buses run to the park entrance (about two hours). If you are hiking west to east — which is what I did and what I recommend — you take the bus to the Pudeto dock, then a catamaran across Lago Pehoe to Paine Grande lodge. That catamaran ride, incidentally, is one of the most beautiful boat trips I have ever taken. The mountains rise straight out of the milky turquoise water and you stand on the deck with your mouth open like everyone else.
Quick Tip
Book the catamaran in advance during peak season. There are only two departures per day and if you miss it, you are stuck at the Pudeto dock until the next one. Getting around Chile requires planning, especially down here.
Day 1: Paine Grande to Grey Glacier — The Entrance Exam
The catamaran drops you at Paine Grande, and you start walking west toward Grey Glacier. This first day is 11 km, listed as "moderate," and it is a solid introduction to what Patagonia is going to do to you for the next four days.
The trail is well-marked and mostly flat for the first hour, skirting the shore of Lago Grey. Then it starts climbing and the wind shows up. I hit gusts so strong I had to stop and brace myself. A woman ahead of me had her hat ripped off and it sailed into the lake. Gone. She watched it float away with a resignation that told me she had already accepted this kind of thing would happen here.
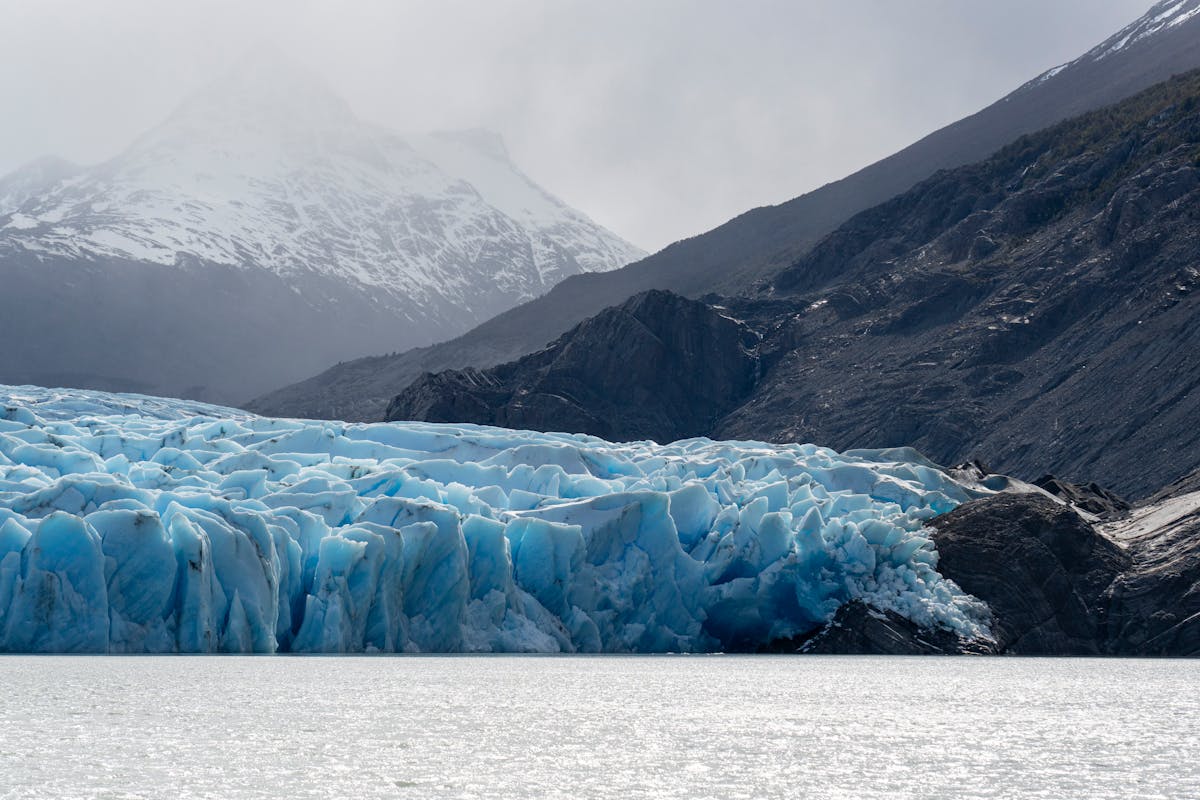
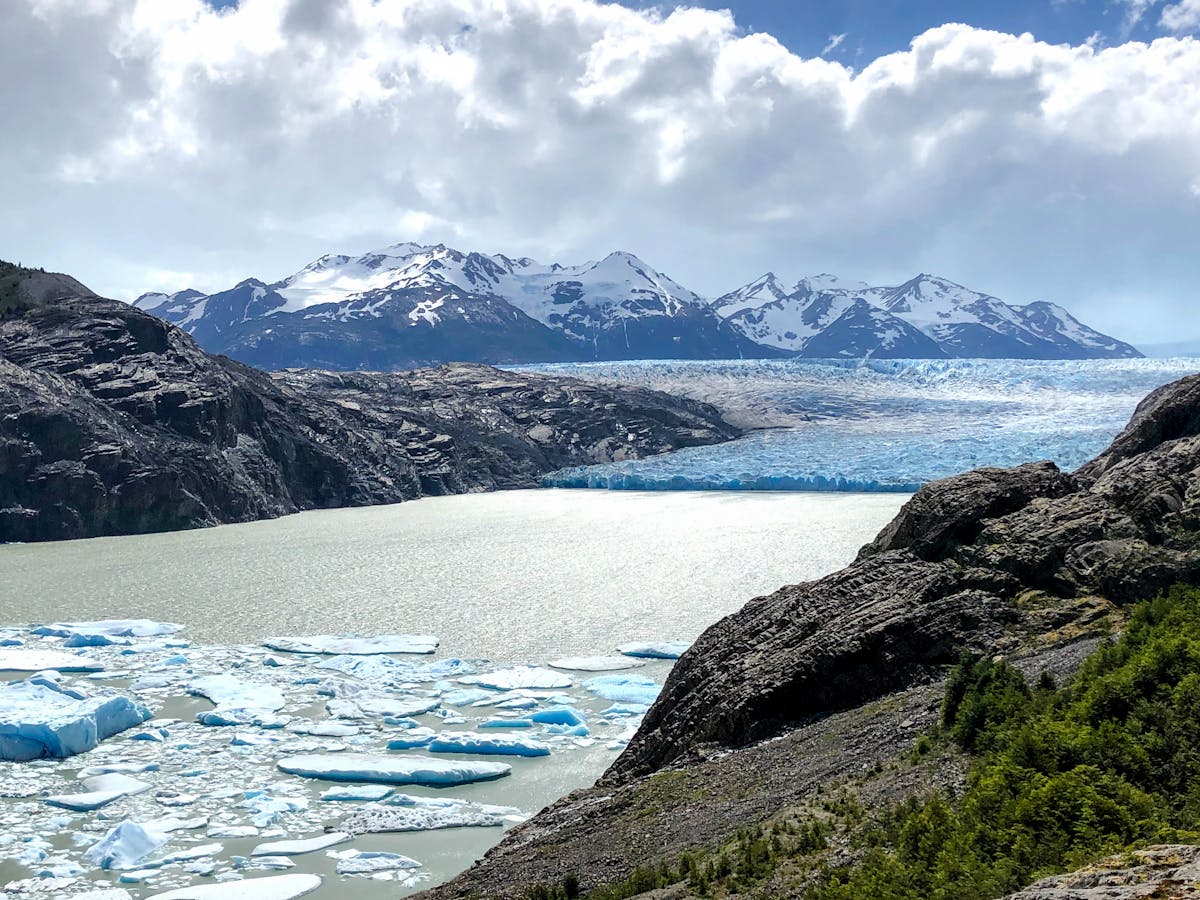
The payoff comes in the final two kilometers, when the trail rounds a bend and Grey Glacier appears. It is enormous — a wall of blue-white ice stretching across the entire end of the lake, with icebergs floating in the water below. I stood there for twenty minutes just watching chunks of ice shift and crack. The sounds carry across the water — deep groans and occasional rifle-shot snaps as the glacier calves.

Camping Grey sits just above the lake with views of the glacier. I set up my tent, cooked pasta on my stove while wearing every layer I had, and watched the sunset turn the ice pink. It was freezing. It was perfect.
The Grey Glacier Boat Option
There is a boat trip that takes you right up to the face of the glacier and even lets you walk on it. I skipped it because of the cost (around $100 USD) and time — adding it means either a very long day one or splitting the Grey section into two days. In hindsight, I wish I had done it. The viewpoint from the trail is impressive, but being at the base of a glacier is a completely different experience. If your budget allows it, do the boat.
Day 2: Grey to Frances — The Long Middle
This is the longest day on the trail — about 20 km if you are doing the standard west-to-east route. I started early, which turned out to be critical because the afternoon wind made the last five kilometers genuinely miserable.
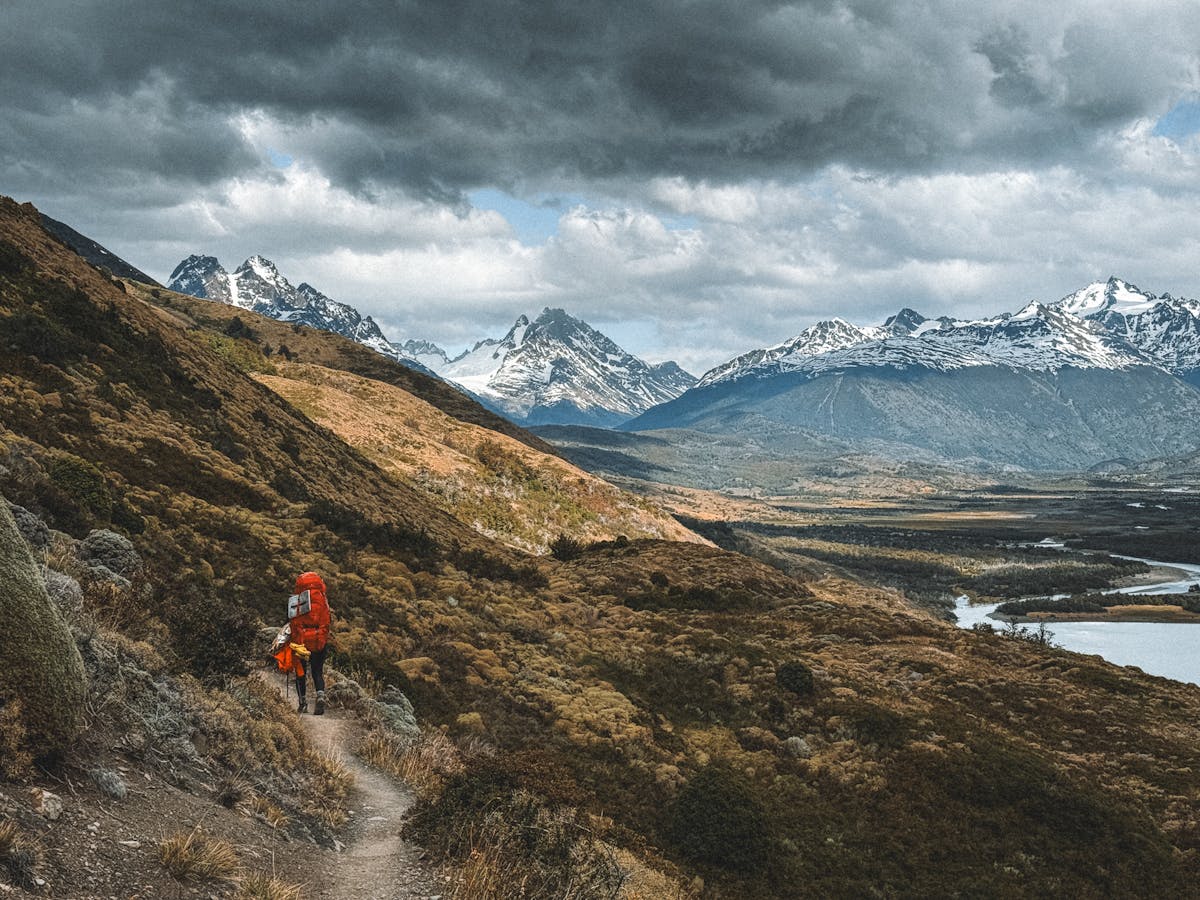
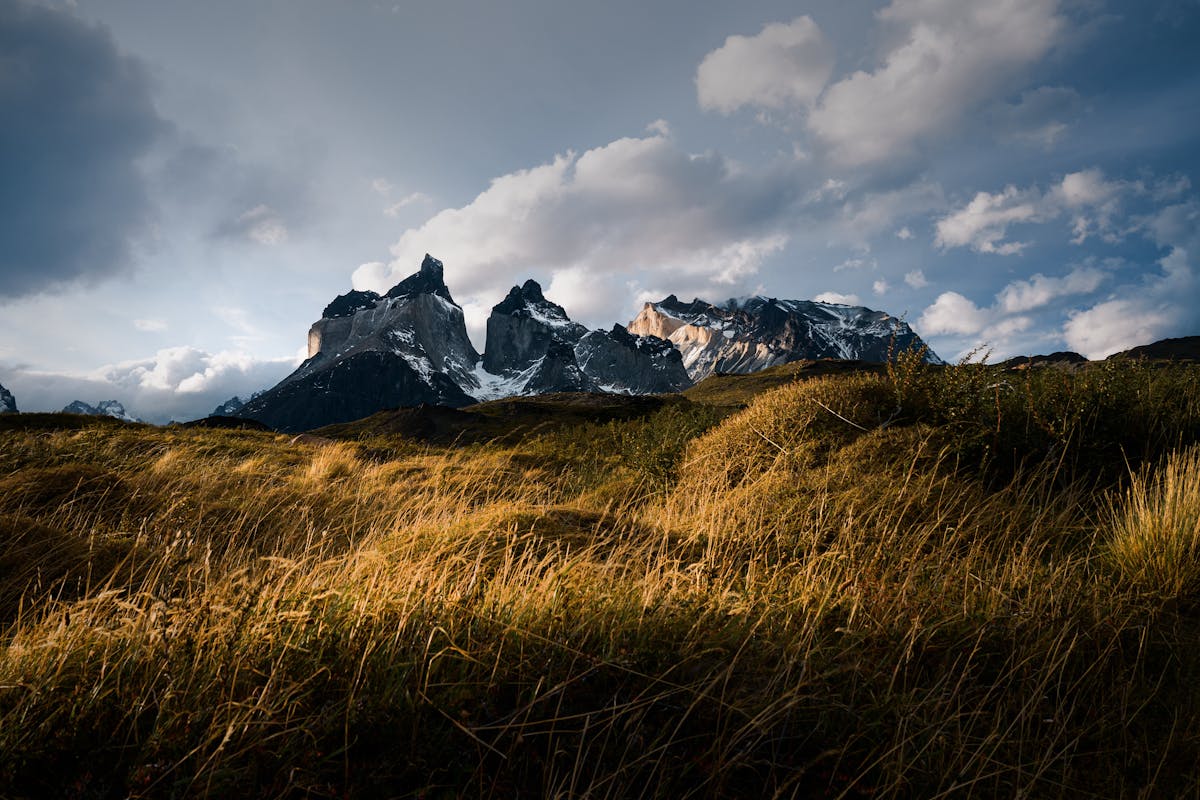
The morning section retraces part of the previous day's trail back to Paine Grande, which feels a bit wasteful. But from Paine Grande heading east, the landscape shifts. The trail follows the shore of Lago Nordenskjold, and the Cuernos del Paine — those dark, horn-shaped peaks with the lighter granite tops — dominate the view to your left for hours.
This is the section where I started falling behind. The wind picked up around noon and turned the flat, exposed lakeside trail into a battle. My pack caught the gusts like a sail. I watched a man's trekking pole get ripped out of his hand and cartwheel across the trail. The views are spectacular the entire way, but you earn them.
I arrived at Camping Frances around 5pm, later than planned, with legs that felt like they belonged to someone much older. The campsite is sheltered in a grove of lenga trees, and after the exposed trail, those trees felt like a fortress. I barely cooked dinner before falling asleep in my tent at 7:30pm.
Day 3: The French Valley — The Day That Justifies Everything
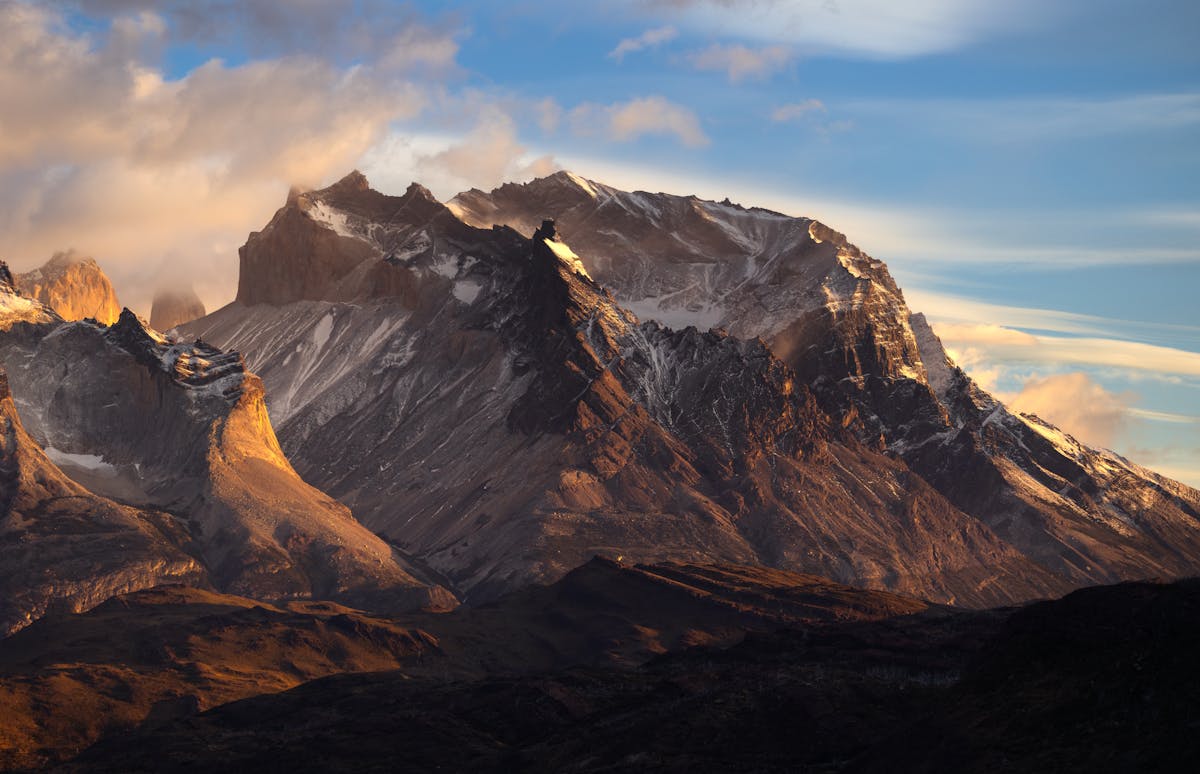
Day three is the reason this trek exists. You leave your heavy pack at camp and do the French Valley as a day hike — up into the hanging valley between the Cuernos and the massive granite wall of Paine Grande mountain, to a lookout called Mirador Britanico.
The trail climbs steeply through forest, crossing a river on a swaying suspension bridge, then breaks above the tree line into a boulder field. This is where the French Valley opens up and your brain stops processing the scale of what you are seeing. Rock walls on both sides rise hundreds of meters straight up. Hanging glaciers cling to ledges that look too small to hold them. Every few minutes you hear the rumble of a small avalanche somewhere above — ice and rock letting go of the mountain.
The Mirador Britanico lookout sits at the top of the boulder field. Getting there took me about four hours from camp. The view is a 360-degree panorama of granite spires, glaciers, and the lake far below. I sat up there for an hour eating trail mix and trying to take photos that would capture it. None of them did. The valley is one of those places where cameras just give up.
The wind at the top was ferocious — that ridge I mentioned at the beginning of this article. But even with the wind, even with the aching legs and the four-hour climb back down, this was the highlight of the entire trek. If you do nothing else in Torres del Paine, hike the French Valley.
Day 4: Frances to Camping Chileno — The Cuernos Corridor
After the intensity of the French Valley, day four feels like a transition. The trail follows Lago Nordenskjold east to Los Cuernos campsite, then continues to Camping Chileno at the base of the Torres valley. It is about 19 km total, mostly flat with a few short climbs.
The scenery along this stretch is what I would call "background spectacular" — meaning the views are constantly gorgeous but you stop actively noticing them because you have been surrounded by mountains for four days and your brain has recalibrated. I caught myself looking at the Cuernos and thinking "yeah, those are nice" about a formation that would be the most impressive thing in most countries.
Los Cuernos campsite is a common lunch stop and one of the more scenic camp locations on the trail — right on the lake with the Cuernos directly above. Many hikers spend a night here and split day four into two easier days. I pushed through to Chileno because I wanted to be positioned for the Torres sunrise the next morning, but if your schedule allows the extra night, Los Cuernos is the place to take it.
The final stretch to Chileno climbs into the Valle del Ascencio and the landscape changes again — denser forest, a rushing river, and the first real sense that you are approaching the end of the W. Camping Chileno is basic and crowded (it is the jumping-off point for the Torres), but the anticipation in camp that evening was palpable. Everyone was setting alarms for 4am.
Day 5: The Torres at Sunrise — and the Long Walk Out
I set my alarm for 3:45am and started hiking in the dark with a headlamp and about thirty other people. The trail from Chileno to the base of the Torres is steep — you gain 600 meters in about 4 km, the last section a brutal scramble over a boulder field. In the dark, with a headlamp beam bouncing off rocks, it felt like climbing the inside of a mine.
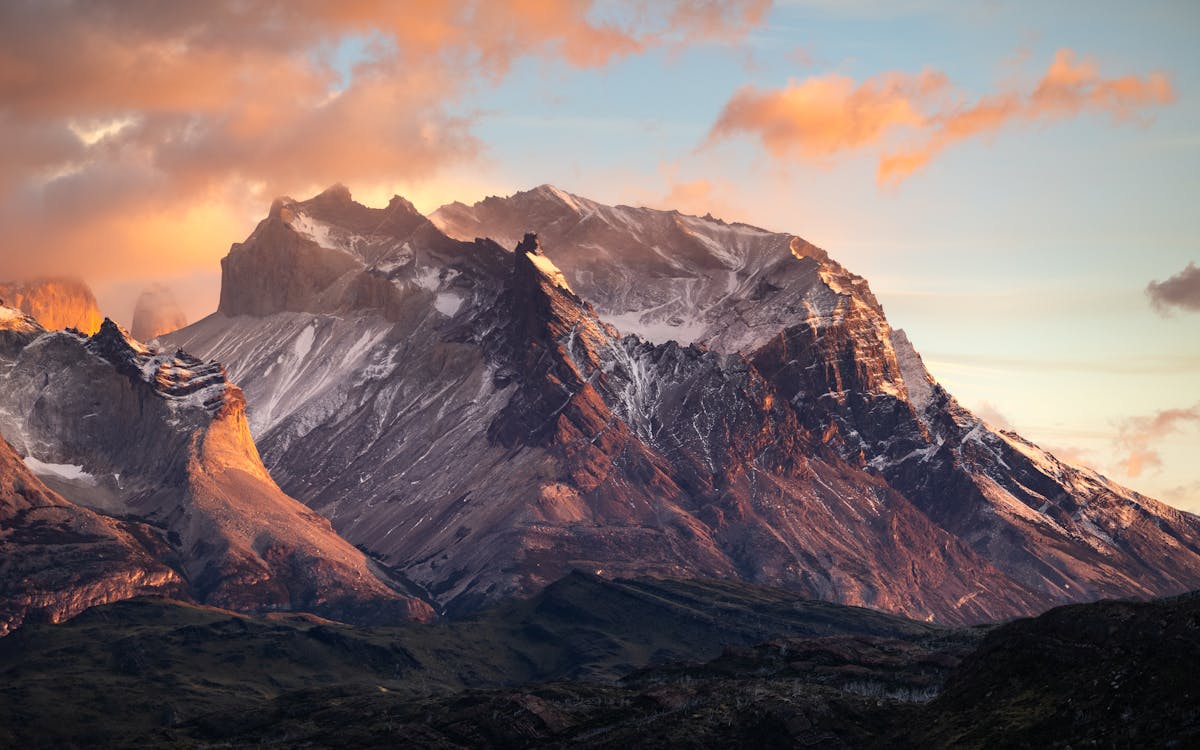
And then you reach the moraine, the boulders give way to a flat area, and the three granite towers are right there — soaring straight up from a glacial lake that is impossibly blue. The first light of sunrise hit the towers and turned them orange, then pink, then blazing gold. The whole thing lasted maybe twenty minutes. Nobody talked. Everyone just watched.
I have seen a lot of sunrises in a lot of countries. This one is different. The towers catch the light in a way that makes them look lit from inside. The reflection in the lake doubles it. It is the kind of scene that made me understand why people hike for five days to stand in one specific spot for twenty minutes.
The hike down is long. Back to Chileno to pack up camp, then all the way down the Valle del Ascencio to the Hotel Las Torres trailhead — about 18 km total with the Torres detour. My knees were done by the final descent. The bus back to Puerto Natales leaves from the Laguna Amarga entrance, a short shuttle ride from the trailhead. I collapsed into the bus seat and slept the entire way back to town.
The Weather Reality in Torres del Paine
Everyone tells you the weather in Patagonia is unpredictable. This is true, but it undersells the situation. The weather is not just unpredictable — it is aggressive. Wind is the dominant feature. Not a pleasant breeze, not a stiff wind. I mean gusts that physically move you, that flatten tents, that make conversation impossible on exposed sections of trail.
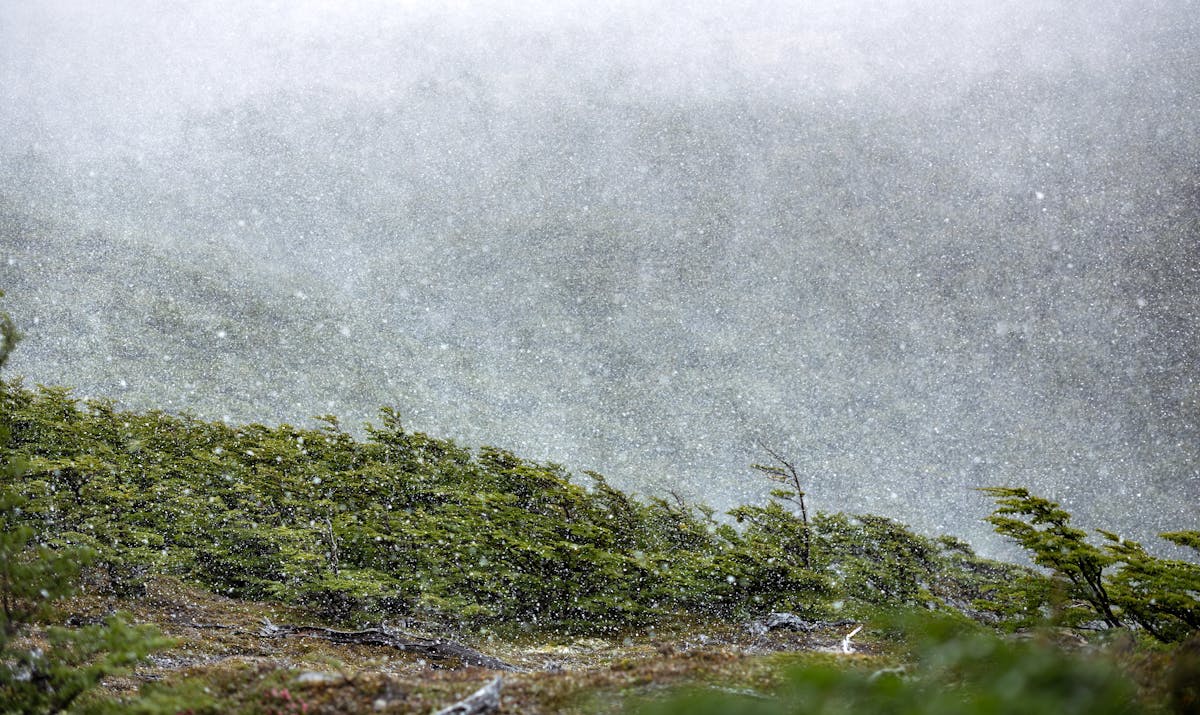
I hiked in mid-January — peak summer — and experienced snow, rain, hail, and 25°C sunshine, sometimes within the same afternoon. The best weather tip I got was from a park ranger: "Dress for the worst conditions and be pleasantly surprised when it's nice." That is exactly right. I wore my rain shell on sunny mornings because I knew the afternoon would change, and it always did.
The best months are December through February, with January being the warmest and most crowded. November and March have fewer hikers and lower prices but more volatile weather. Timing your Chile trip matters enormously down here — this is not a place where any week is as good as any other.
Costs: What I Actually Spent
The W Trek has gotten expensive. Not backpacking-in-Europe expensive — more like it-costs-real-money-and-you-should-budget-for-it expensive. Here is what my five-day camping trip actually cost, in rough numbers.
| Expense | Cost (USD) |
|---|---|
| Park entrance fee | $35 |
| 5 nights camping | $50 |
| Catamaran Pudeto to Paine Grande | $35 |
| Bus Puerto Natales to park (return) | $30 |
| Food (brought from Puerto Natales) | $60 |
| Gas canister | $10 |
| Extras at refugio shops | $25 |
| Total (camping, own gear) | ~$245 |
| Total if staying in refugios | ~$800-1,000 |
This does not include the flight to Punta Arenas from Santiago ($150-250 round trip if booked early) or gear you need to buy. But the on-the-ground cost for the trek itself, if you camp and carry your food, is surprisingly reasonable for what you get. For tips on managing costs in Chile, it helps to buy food in Puerto Natales where prices are much lower than inside the park.
West to East or East to West?
I hiked west to east: Grey Glacier first, Torres last. I recommend this direction for one reason — you end with the Torres sunrise. Finishing on the strongest note matters. The Grey Glacier is impressive, but the Torres at sunrise is transcendent, and having that as your final memory of the trek is something I would not trade.
The counterargument is that east to west lets you tackle the steepest climb (to the Torres) when your legs are fresh. That is valid. But I had no problem with the climb on day five — the adrenaline of knowing it was the last push carried me up. The people I met who hiked east to west said their final day at Grey felt anticlimactic after the Torres. Make of that what you will.
What I Would Do Differently
After five days on the trail, here is what I would change if I did the W again.
Add a sixth day. The standard five-day itinerary works, but day two (Grey to Frances) is punishingly long. I would spend a second night at Paine Grande and split that walk into two manageable days. The extra campsite fee is negligible compared to the reduction in suffering.
Do the Grey Glacier boat trip. I mentioned this earlier, but it bears repeating. The viewpoint from the trail is good. Being on the water, surrounded by icebergs, watching the glacier face crack and shift — that is something else entirely.
Bring less food, bring better food. Five days of freeze-dried meals gets monotonous fast. I would bring more variety — cured sausage, hard cheese, good chocolate, instant coffee that does not taste like sadness. The weight savings from cutting extra food would let me carry better food.
Book the refugio at Frances. Just one night. After the long day two and before the French Valley climb on day three, having a real bed, a hot meal cooked by someone else, and a shower would have been worth the splurge. Camp the rest, but treat yourself at Frances.
Spend two nights in Puerto Natales after. I bussed straight to Punta Arenas the day after finishing the trek, and my body was not ready for more travel. Puerto Natales is a pleasant town with good restaurants and it is the right place to recover, wash your gear, and bore other hikers with your trail stories over pisco sours.
Beyond the W: Other Ways to Experience the Park
The W Trek is the headline act, but Torres del Paine has plenty for people who are not up for five days of backpacking. There are excellent day hikes in Torres del Paine that let you see the highlights without the heavy pack — the Torres base hike can be done as a single long day from the Hotel Las Torres trailhead.
If you have more time, the O Circuit extends the W into a full loop around the Paine Massif — eight to ten days through terrain that is wilder and less crowded than the W. And for something completely different, puma tracking has become one of the most popular wildlife experiences in the park. Torres del Paine has one of the highest concentrations of wild pumas in the world, and guided tracking trips have a surprisingly high success rate.
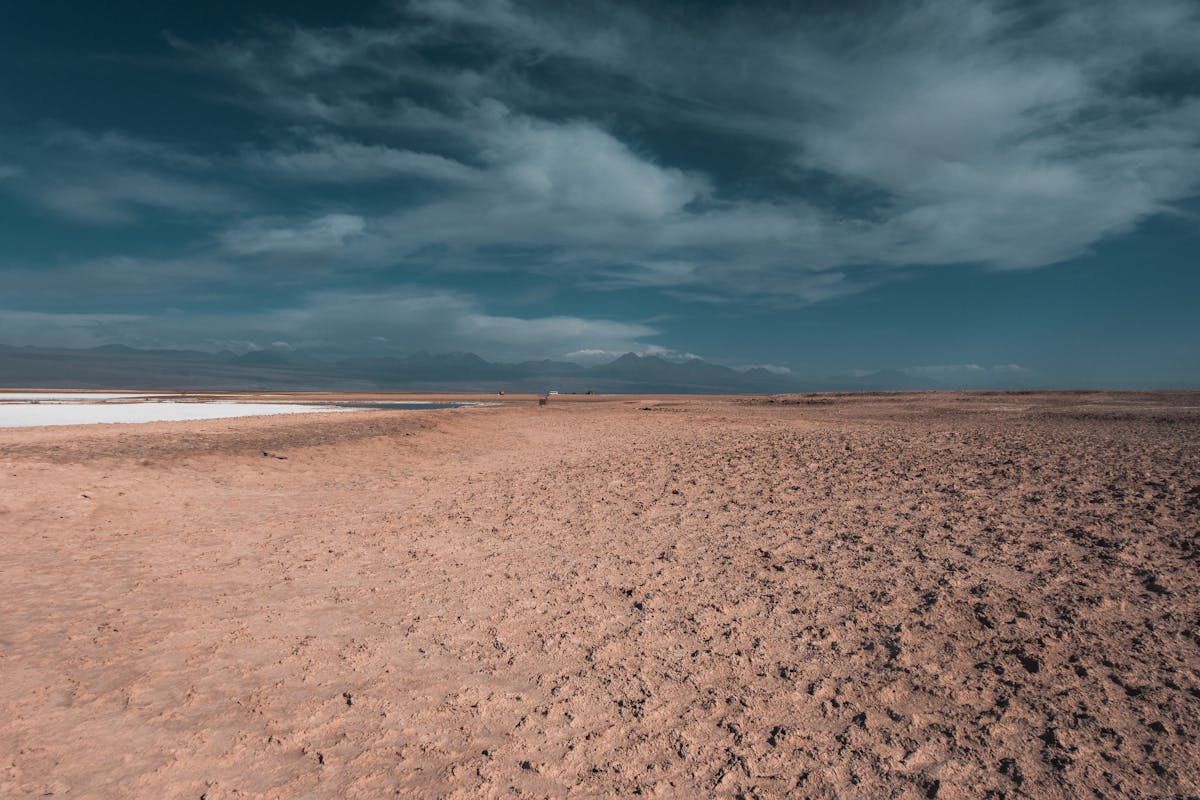
For hiking in Chile generally, the W Trek is the marquee experience, but it is not the only one. The country has thousands of kilometers of trails, from the bone-dry Atacama to the rainforests of the Carretera Austral. But the W is special. It earns its reputation.
The Practical Checklist
Essential Gear
- Tent: Three-season minimum. Freestanding preferred — some campsites have rocky ground that rejects tent stakes
- Sleeping bag: Rated to -5°C or lower. Summer nights regularly drop to 0-5°C
- Rain shell + pants: Waterproof, not water-resistant. Gore-Tex or equivalent
- Trekking poles: Non-negotiable for the descents
- Layers: Merino base, fleece mid, puffy jacket for camp
- Stove + gas canister: Buy the canister in Puerto Natales (cannot fly with it)
- Headlamp: Essential for the pre-dawn Torres hike
- Sunscreen + sunglasses: The UV down here is no joke. The ozone layer is thinner this far south
Getting There
- Fly Santiago to Punta Arenas (3.5 hours)
- Bus Punta Arenas to Puerto Natales (3 hours)
- Bus Puerto Natales to Torres del Paine (2 hours)
- Catamaran Pudeto to Paine Grande (30 minutes, if hiking west to east)
- See our getting around Chile guide for more transport details
When to Go
- Peak season: December-February. Best weather, most crowded, book 3+ months ahead
- Shoulder season: November and March. Fewer hikers, colder nights, better availability
- Avoid: April-September. Most facilities close. Snow and extreme wind make the W dangerous
- Read our when to visit Chile guide for seasonal details across the country
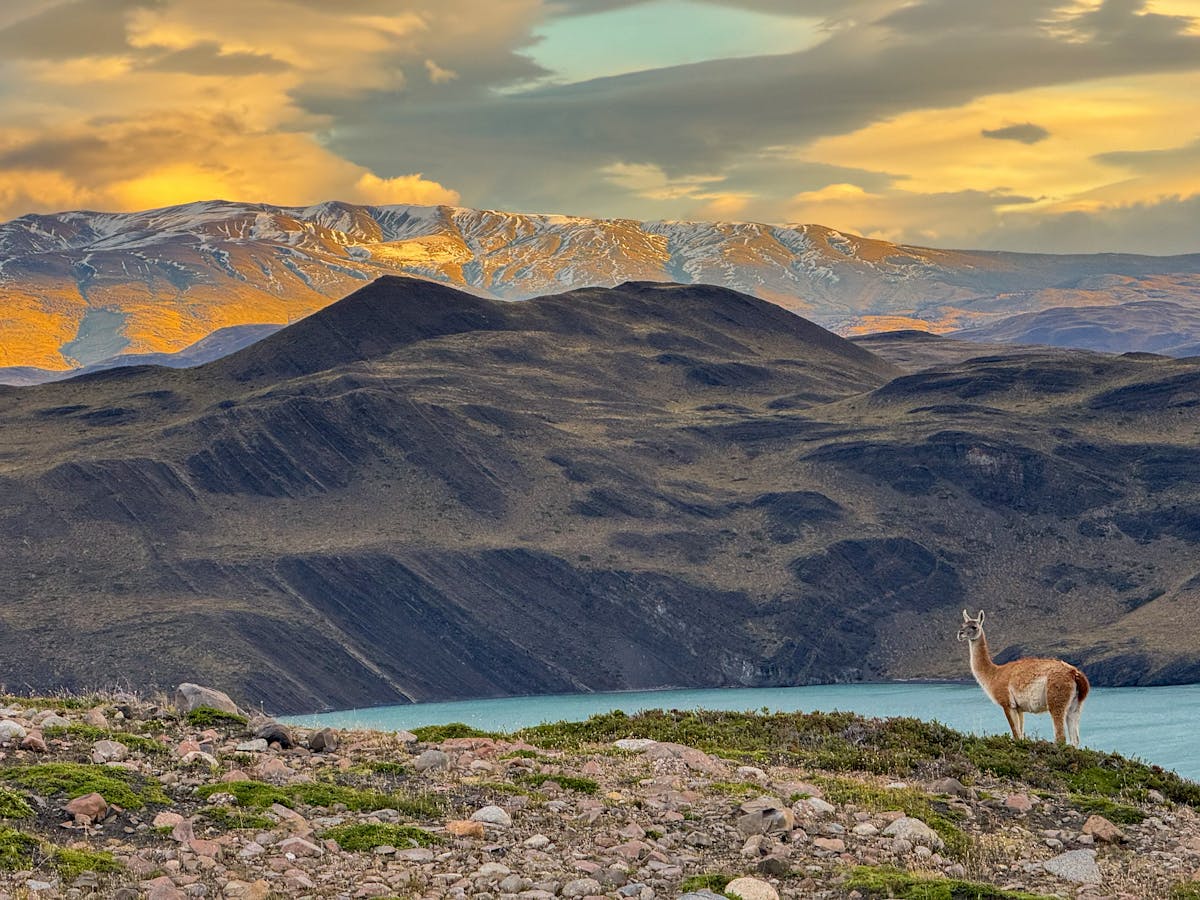
I think about the W Trek more than any other hike I have done. Not just the big moments — the Torres at sunrise, the French Valley panorama, the glacier — but the small ones. The guanaco that stared me down near the park entrance. The Italian family at Camping Frances who shared their wine. The sound of wind in the lenga trees at 6am, before anyone else was awake. Torres del Paine is a place that settles into you. You carry it home whether you mean to or not.